Minimum Metadata Settings
For each photo, in the Library module, at a minimum, populate the following fields:
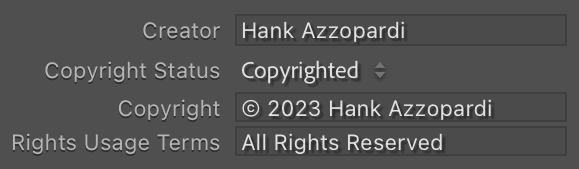
- Title field
- Enter your name in the Creator field
- Change the Copyright Status to Copyrighted
- Enter a Copyright string in the format @ YYYY Name
- Enter All Rights Reserved into the Rights Usage Terms field.
Note: These copyright fields can be automatically populated on import. All these fields are used in a Publish Service, covered below.
Publish Service
By using a Publish Service, you can automate not only the resizing of images, but also the correct file naming. You set up a Publish Service once, and use it every time.
1. In the left-hand column, scroll down to the Publish Services panel.
2. Click the Plus button on the right-hand side of the Publish Services panel header. Select Go to Publishing Manager….
3. In the bottom left-hand column, click the Add button.
4. Change Via Service to Hard Drive. Enter IWPS Competition (Digital) in the Name field and click the Create button.
5. Configure the settings per this screenshot:
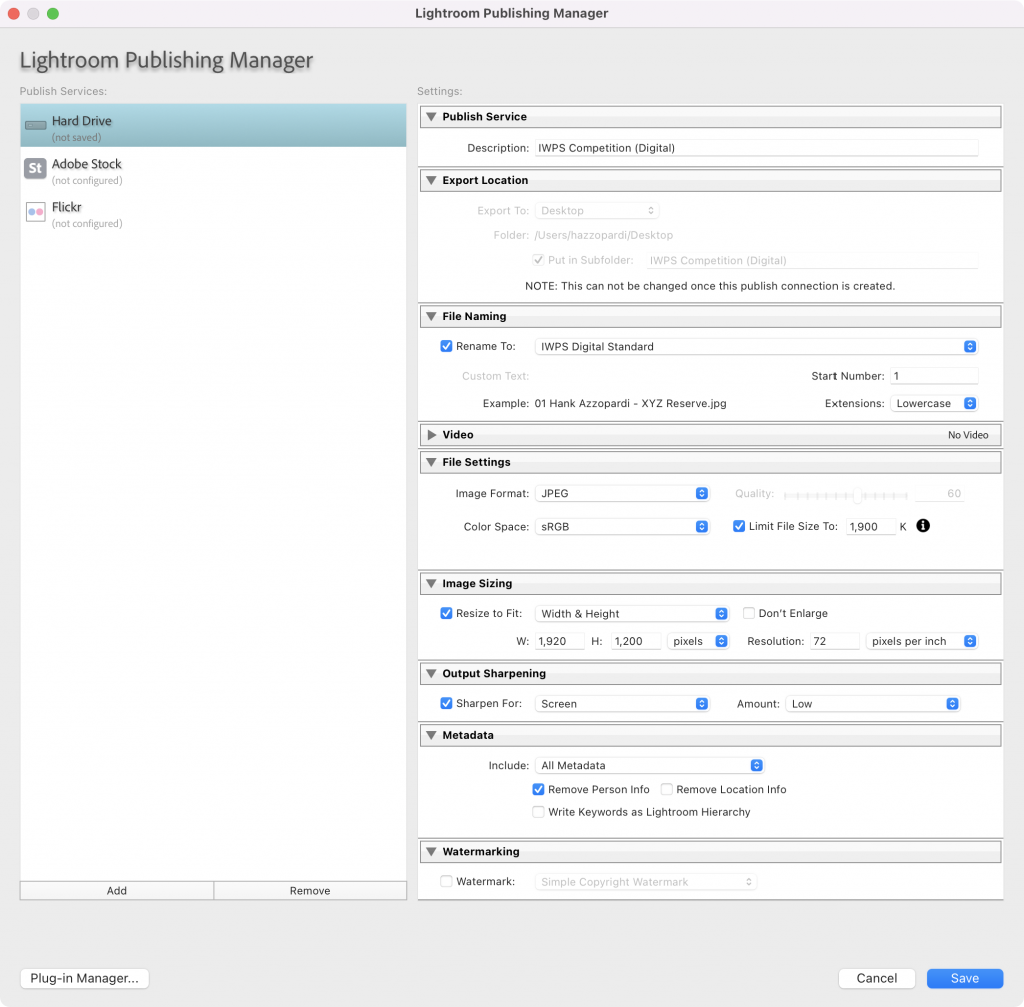
6. As part of this configuration, in the File Naming section, check the Rename to: checkbox to make it active. Click the menu and select Edit….
7. Configure as per this screenshot:
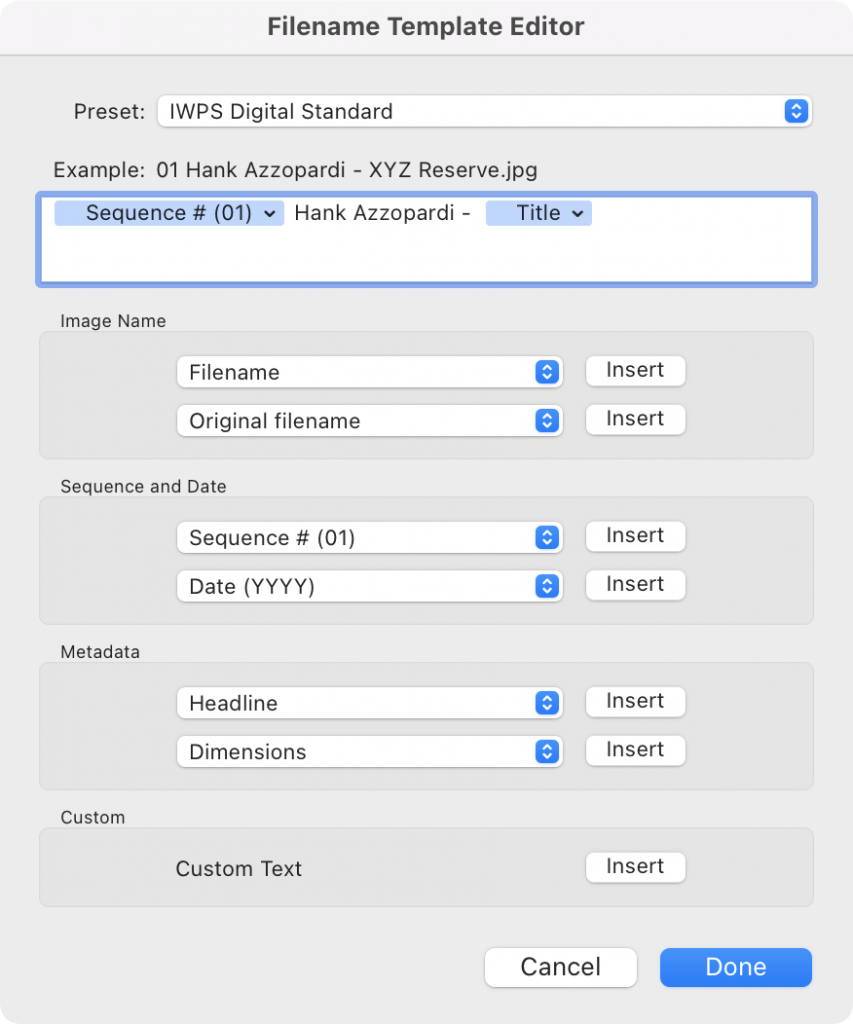
8. In the Preset menu, select Save Current Settings as New Preset.
9. Enter IWPS Digital Standard in the Preset Name field and click the Create button. This will configure the File Naming section of the Publish Service.
Using the Publish Service
1. When you’re ready to publish, select the photos and drag to the IWPS Competition (Digital) folder in the Publish Service panel.
2. Click the IWPS Competition (Digital) folder. This will show the photos you’ve selected to publish.
3. Click the Publish button. The photos will be resized and renamed and appear in the IWPS Competition (Digital) folder on the desktop.
4. Email the files to the Competition Secretary.


